CCB License#218431
Posted by: Elite Restoration on September 15, 2022
What’s Growing On Up There
The holidays are quickly approaching. You’ve clambered into the attic to begin to pull out all the decorations and knick knacks. It smells mustier than you remember. You pull the cord for the light, and there it is: something is growing up here. It’s covering the rafters and the roof sheathing, and there’s even some on the insulation. Where do you go from here?
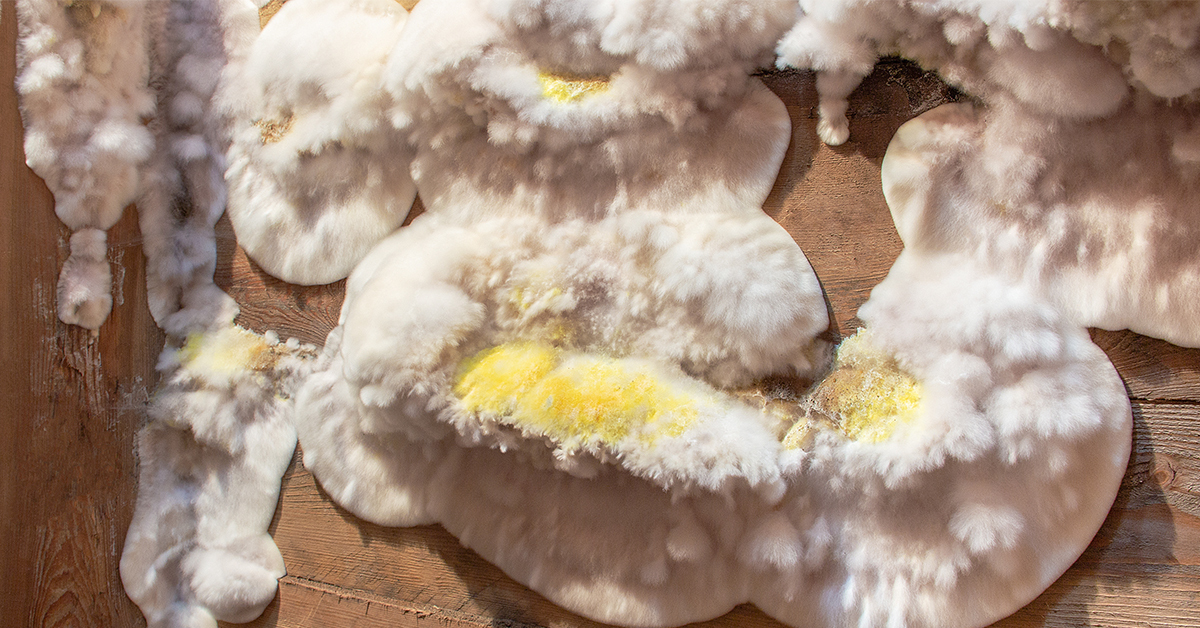
What Is It?
Mold is a fungus that grows in the form of multicellular filaments called hyphae. There are many different species of mold, and only lab testing can confirm the particular type of mold in any given situation. Fortunately, the specific type of mold isn’t typically relevant to the fact that the mold needs to be removed or the method of removal. Mold inside a home, even in the attic, is a health hazard and needs to be properly remediated no matter the species.
Causes and Prevention
Mold in an attic, or anywhere else in the home for that matter, is caused by moisture. One of the most common causes of attic mold is improperly vented exhaust fans from bathrooms, kitchens, and clothes dryers. Exhaust fans should always be vented to the exterior of the house. These fans push warm, moist air out of the vents creating a perfect environment for mold to grow. So, why do people often find mold in their attics during or just after the time of year when their heat is running? The answer is attic bypasses. These are air leaks that allow warm, moist air from the main house to get into the attic and can occur whether the heater is running nonstop or it was just turned on to take the morning chill out of the air. These leaks can be easily found with an infrared camera, and traditional insulation is not enough to stop them because it doesn’t stop air movement. These leaks need to be covered with an air barrier such as foam insulation or caulk in order to properly seal them.
Removal
Although many people think that mold is no big deal and can be easily removed as a DIYer, it’s usually best to call in a professional for proper remediation. Mold can be finicky, and if not treated properly will grow back, often worse than before. The first step in professional remediation, or even if you’re going to try to handle it yourself, is to hire a mold inspector to discover the cause of the mold and the extent of the issue. Upon completing the inspection, most inspectors will recommend a reputable remediation company to take care of the removal. This cleanup process usually states with removing all water-damaged and mold-infested materials. The technician will then use specialized cleaning products to clean and disinfect any and all materials affected by the mold. If the damage is very extensive, they may remove drywall and clean or remove the studs behind the drywall. The final step is using HEPA filtration followed by replacing any materials that had to be removed and returning all cleaned belongings. If the damage is not severe and you decide to try to clean it by yourself, remember that thoroughly scrubbing is the first step to removing the mold. Often, it is recommended to scrub with a soft brush and a bleach solution. If this is the chosen method, be sure to rinse the area very thoroughly. Bleach left to dry on the surface will turn to sugar and feed the mold, causing it to return. A better idea would be to use a cleaner specifically formulated for mold removal.
It’s always a good rule of thumb to remember that excess moisture will almost inevitably cause a mold issue. Like anything, understanding the causes and seeking prevention is the best route to take. When prevention fails, it’s best to hire professionals to assess and remediate the damage if possible.
Frequently Asked Questions
While some homeowners may attempt DIY installation, professional installation ensures proper coverage and safety compliance, minimizing the risk of issues such as settling or compression.
While some tasks can be DIY, such as cleaning and disinfection, professional remediation is recommended for complex issues or extensive contamination.
There are a few different methods of achieving this, the most common is in part with re-roofing the mobile home after blowing insulation into the attic cavity.
Yes, we provide warranties for both labor and materials, including 20-year warranties on encapsulation systems.
Most homeowner's policies cover most water damages, but not all water damages are created equal. There can be a lot of exceptions to coverage depending on the intricacies of your policy. This is why it's a good idea to be familiar with your policy and call your agent right away when damage occurs.
As with all insurance related questions, the answer is that it depends on your coverage. Usually, though, the answer is yes. While there are some types of water damages that aren't covered by standard policies or reasons your policy might not cover the damage, if the water damage is covered by your policy the drying process will also be covered.
A good portion of water damage can be prevented by proper household maintenance. Routine plumbing maintenance, as well as sump pump and appliance maintenance, are effective ways to avoid preventable damages. If you live in a cold climate, preparing your home for the winter can also help avoid damage. Finally, it's a good idea to regularly check the exterior of your home, particularly your roof, for damage to ensure water isn't unexpectedly leaking into your home.
Seal any potential entry points, such as gaps in the roof or vents, and trim overhanging tree branches.
DIY soot removal is not recommended. Commercially available products can actually cause permanent damage to surfaces. Soot itself is primarily oil-based, but that residue also contains toxic, possibly biohazard contaminants.
Identifying the source of the water damage is one of the first steps in both the insurance claim process and before beginning to dry out and repair the damaged areas. After all, if you replace a sagging, wet ceiling that was caused by a roof leak but don't fix the roof, too, the next rainstorm will start the cycle all over again. The buckling to your hardwood floor could be caused by a leaking pipe. We will pinpoint the exact cause of your water damage and make sure the source is repaired. We make sure your restoration job is done right the first time.
Related Posts
Seasonal Survival: How to Prepare Your Home for Unexpected Weather Events
In the face of increasingly unpredictable weather, ensuring the safety and resilience of your home has never been more critical. From torrential rains (more)
Top 5 Innovations in Water Damage Restoration That Are Revolutionizing the Industry
As a homeowner or business owner, understanding the advancements in water damage restoration can preserve property integrity and prevent exorb (more)